
TL;DR:
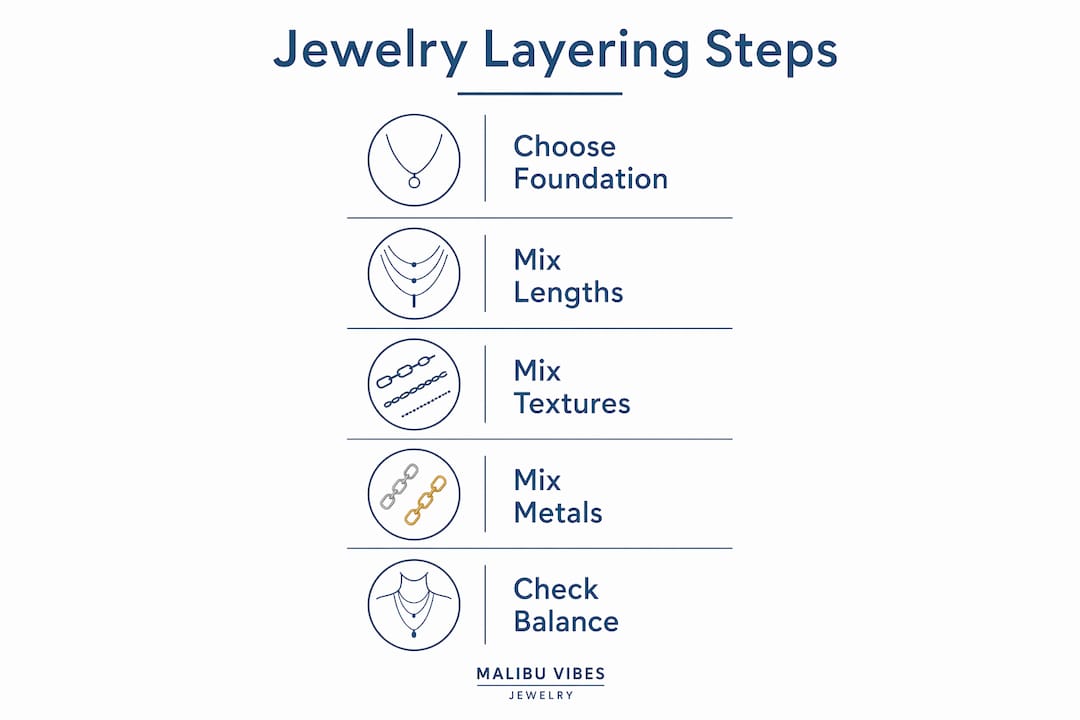
- Step-by-step jewelry layering involves selecting a strong foundation piece and building outward with deliberate length gaps and contrasting textures. Mixing lengths, textures, and metals carefully creates a balanced, intentional stack that reflects personal style, with odd numbers of layers enhancing visual rhythm. Editing and arranging layers thoughtfully ensure a polished look, while breaking rules can add unique character.
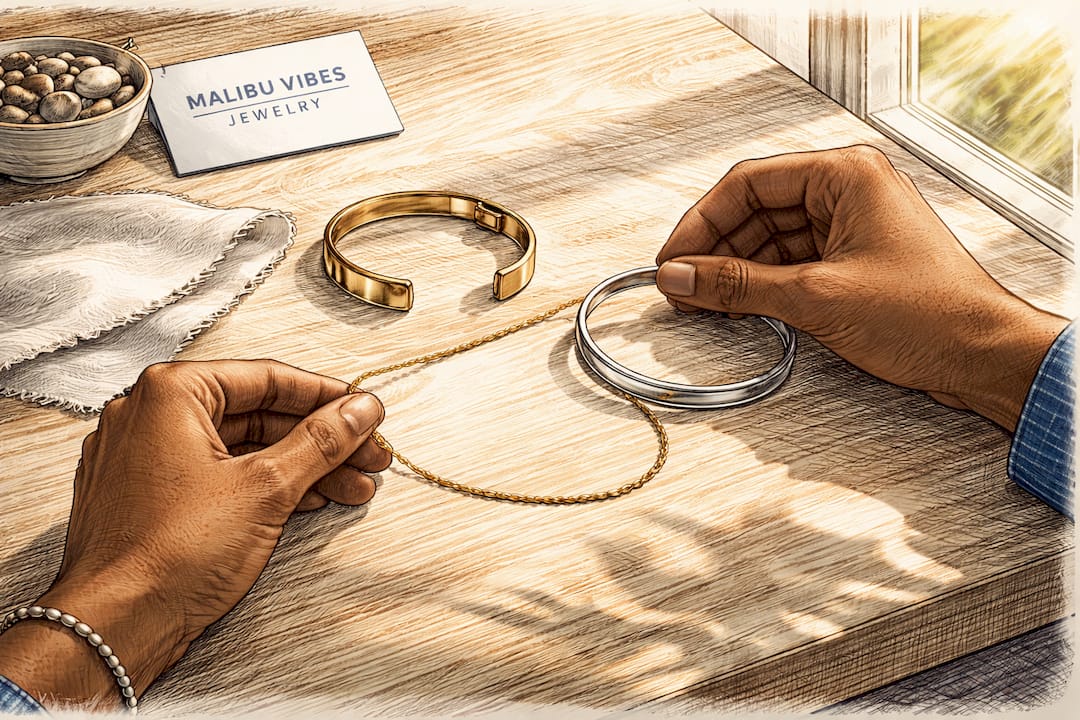
Step by step jewelry layering is the practice of combining multiple necklaces, rings, and bracelets in deliberate sequence to build a curated, balanced accessory stack that reflects your personal style. Stylists at Tiffany & Co. and trend analysts at designsignal.ai both confirm that the difference between a polished layered look and a tangled mess comes down to process, not luck. This guide walks you through every stage of that process, from selecting your foundation piece to managing metals and avoiding the most common layering mistakes. Follow these steps and you will build stacks that look intentional every single time.
What foundational pieces to choose for your jewelry layering stack
The foundation piece is the anchor of your entire layered look, and choosing it correctly determines everything that follows. According to designsignal.ai’s 2026 data, your foundation necklace should carry 40 to 50 percent of the total visual weight of your stack. That means it needs to be substantial enough to hold the composition together without competing with the pieces you add on top.
For necklaces, the best foundation lengths fall between 14 and 18 inches. A choker sits at the collarbone and creates a clean starting point for longer chains to cascade below it. A 16-inch collarbone chain works equally well as a base because it sits close to the skin and leaves clear visual space for the next layer. Both options give you a defined starting point rather than a cluttered middle zone where chains compete for attention.
For rings, your foundation is typically your most substantial band or your most meaningful stone. A solid 14k gold band or a gemstone ring with real visual presence sets the tone for the thinner bands and midi rings you stack around it. The same logic applies: one dominant piece, supporting cast around it.
Pro Tip: Choose your foundation piece first, then build outward. Never start with the statement piece and try to work backward. The foundation sets the scale for everything else.
How to mix lengths, textures, and metals for visual balance
Mixing lengths, textures, and metals is where layering becomes genuinely expressive, but it requires a clear framework to avoid chaos. The optimal spacing between chains is 2 to 4 inches depending on your proportions and neckline. Spacing chains too close together creates visual noise. Spacing them too far apart breaks the sense of a cohesive stack.
Celebrity stylists cited by Parade recommend mixing fine and weightier chains deliberately. A delicate 1mm cable chain paired with a chunkier 3mm rope chain creates contrast without tangling, because the different weights naturally separate. Pairing two chains of identical weight and texture is the most common beginner mistake. They cling together and read as one piece instead of two.
Here is a quick reference for how different layering variables interact:
| Variable | What works | What to avoid |
|---|---|---|
| Chain lengths | 2 to 4 inches apart per layer | Chains within 1 inch of each other |
| Chain textures | Fine cable with rope or box chain | Two identical chain styles |
| Metals | Mixed with consistent finishes | Polished gold with matte silver |
| Number of layers | Odd numbers: 3, 5, or 7 | Even numbers that feel symmetrical |
| Pendants | One statement, smaller accents | Multiple large pendants competing |
The 2026 trend called “intentional discord” takes metal mixing further than most people expect. Mixing silver, gold, and rose gold in the same stack is now considered modern rather than mismatched, provided you keep finishes consistent. Polished gold pairs with polished silver. Matte rose gold pairs with matte silver. The finish creates the visual thread that holds the mixed metals together.
Odd numbers of layers create more dynamic visual rhythm than even numbers. Three necklaces read as a composed trio. Four necklaces tend to look accidental. This principle mirrors the rule of odds used in interior design and photography composition.
Neckline also shapes your choices. V-necks favor graduated chains that echo the neckline’s angle. Crewnecks work better with longer linear layers that extend below the fabric. Boat necks and off-shoulder styles pair best with a single statement choker rather than multiple layers.
Pro Tip: Lay all your candidate pieces flat on a white surface before putting them on. You will spot clashes in scale, texture, and metal finish far more easily than you will in a mirror.
Step-by-step layering method from start to finish
This is the ordered process that takes you from an empty neck to a finished, polished stack. Follow it in sequence and you will avoid the most common assembly errors.
- Select your foundation piece. Put on your base necklace or ring first. Confirm it sits where you want it and feels comfortable. This is your reference point for everything else.
- Add your second layer with a clear length gap. Choose a chain that sits at least 2 inches below your foundation. If your base is a 16-inch choker, your second layer should be 18 to 20 inches.
- Introduce texture contrast. If your foundation is a fine cable chain, your second layer should have a different link style. A box chain, a herringbone, or a rope chain all create visible contrast.
- Place your focal or statement piece. One large pendant or a color gemstone necklace should anchor the middle or lower portion of your stack. Pendant hierarchy is clear: one dominant piece with smaller supporting elements prevents visual confusion.
- Add a third layer if needed. A third chain at 22 to 24 inches completes the trio. Keep it lighter in weight than your statement piece so it frames rather than competes.
- Position clasps at the back. Stagger clasps so they do not all sit at the same point on your neck. This prevents bulk at the nape and keeps the front of the stack clean.
- Apply the same logic to rings. Place your foundation ring on your dominant hand. Add thinner bands on adjacent fingers or stack midi rings above the knuckle. Keep the total visual weight balanced across both hands if you are stacking on multiple fingers.
A few additional points worth noting as you build:
- Start with 2 to 3 pieces rather than adding everything at once. Build gradually and assess after each addition.
- Step back from the mirror after adding each piece. Close-up assessment distorts scale.
- Move around before committing to the final look. Chains that look perfect standing still sometimes tangle when you move your arms.
Common mistakes to avoid when layering jewelry
Even experienced jewelry wearers make layering errors that undermine an otherwise strong look. Knowing what to watch for saves you time and frustration.
- Over-cluttering the stack. More pieces do not equal more style. A stack of seven necklaces with no clear hierarchy reads as clutter, not curation. If you cannot identify your focal piece within two seconds of looking at the stack, you have too many competing elements.
- Ignoring scale relationships. A delicate 1mm chain paired with a large statement pendant creates an imbalance that looks unintentional. Match pendant size to chain weight. Heavy pendants need chains with enough visual mass to support them.
- Mixing finishes carelessly. Polished and matte finishes in the same stack create a disjointed look even when the metals match. Consistent finishes are what make mixed metal stacks look deliberate rather than accidental.
- Neglecting movement management. Clasp positioning and chain movement determine whether your stack stays elegant all day or turns into a tangled knot by noon. Use a necklace detangler or a multi-strand clasp if you wear three or more chains regularly.
- Ignoring your instinct to edit. If something feels off, it probably is. Remove the piece you are least sure about and reassess. A cleaner stack almost always reads as more intentional than a loaded one.
“When in doubt, take one piece off. The edit is always the right move.” This principle, echoed by stylists across the industry, is the single most useful rule in jewelry layering.
Pro Tip: Store your layered sets together in a small zip-lock bag or a dedicated jewelry tray section. Reassembling a proven combination takes 30 seconds instead of 10 minutes.
Key takeaways
Effective jewelry layering follows a clear sequence: anchor with a strong foundation, build with deliberate length gaps and texture contrast, and edit ruthlessly until the stack reads as intentional.
| Point | Details |
|---|---|
| Foundation piece first | Your base should carry 40 to 50 percent of the total visual weight of the stack. |
| Space chains 2 to 4 inches apart | Consistent spacing prevents tangling and creates clear visual separation between layers. |
| Use odd numbers of layers | Three, five, or seven pieces create more dynamic rhythm than even-numbered stacks. |
| Match finishes when mixing metals | Polished with polished and matte with matte keeps mixed metal stacks looking intentional. |
| Edit before you commit | Removing one uncertain piece almost always improves the overall look. |
Why layering jewelry changed how I think about personal style
I used to treat jewelry as an afterthought. One necklace, one ring, done. The first time I deliberately built a three-necklace stack using a 14k gold choker, a longer cable chain with a small diamond pendant, and a 24-inch bezel chain, something shifted. The look felt assembled rather than accidental. That distinction matters more than most people realize.
What I have found over years of experimenting is that layering works best when you treat it as a practice rather than a formula. The rules in this guide are real and they work, but the most interesting stacks come from breaking one rule deliberately. Mixing a vintage locket with a modern geometric pendant creates a tension that no perfectly matched set can replicate. Mixing vintage and contemporary pieces adds character that purely curated sets often lack.
My honest advice: start with two pieces you already own and love. Build from there. You do not need a new collection to layer well. You need a clear eye and the willingness to edit. Confidence in layering comes from repetition, not from owning more jewelry. Once you find combinations that work for your proportions and your wardrobe, you will reach for them automatically. That is when layering stops being a technique and starts being your style.
For occasion-specific stacking, I keep a casual daytime set and a more formal evening set ready to go. The daytime stack is lighter and simpler. The evening stack uses heavier chains and a statement pendant. Same principles, different scale. You can explore how to adapt stacks for any occasion to see how that shift in scale plays out across different settings.
— Ara
Build your layered look with Malibuvibesjewelry

Malibuvibesjewelry designs pieces specifically suited for layering, from fine sterling silver chains that serve as perfect second and third layers to celestial pendants that anchor a stack with genuine focal presence. Every piece is handcrafted in Los Angeles using 14k gold, sterling silver, and genuine gemstones, which means the weight, finish, and scale are consistent enough to layer with confidence. If you want to understand what goes into each piece before you buy, the jewelry making process page walks through the craftsmanship behind every design. Quality at the foundation level makes every layer above it look better.
FAQ
What is the best starting point for jewelry layering?
Start with a single foundation necklace at 14 to 16 inches that carries 40 to 50 percent of your stack’s visual weight. Build outward from there with chains spaced 2 to 4 inches apart.
How many necklaces should you layer at once?
Three necklaces is the most manageable starting point for beginners. Odd numbers such as three, five, or seven create more dynamic visual rhythm than even-numbered combinations.
Can you mix gold and silver when layering necklaces?
Yes. The 2026 “intentional discord” trend makes mixed metals a deliberate style choice. Keep finishes consistent, polished with polished or matte with matte, to hold the look together.
How do you stop layered necklaces from tangling?
Mix chain weights and textures so fine and heavier chains naturally separate. Stagger clasp positions at the back of your neck and consider a multi-strand clasp for stacks of three or more chains.
Does your neckline affect how you should layer necklaces?
V-necks work best with graduated chains that follow the neckline’s angle. Crewnecks suit longer linear layers that extend below the fabric. Matching your chain lengths to your neckline shape creates a more cohesive overall look.
Recommended
- Jewelry layering guide: master chic stacks for any occasion – Malibu Vibes Jewelry
- How to design a jewelry stack: effortless layering guide – Malibu Vibes Jewelry
- Jewelry Layering Explained: Styling Tips and Trends – Malibu Vibes Jewelry
- How to Layer Necklaces: Expert Workflow for Style – Malibu Vibes Jewelry